Beginner-Friendly Glueless Wig Install: A Step-by-Step Guide
If you've ever watched a wig-install video and thought, “There is no way I'm doing all of that every morning,” a glueless wig may be a better place to start.
One of the biggest reasons I like glueless installs is the freedom they can give you. You don't necessarily need layers of adhesive, sprays or gels to create a beautiful, natural-looking result.
And if you're new to wigs, learning a simple glueless routine can make wearing one feel much less intimidating.
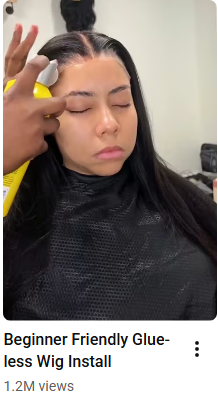
I'm going to walk you through the basics here, but this blog is meant to work alongside my full video tutorial on YouTube, where you can actually watch the placement, lace work and styling happen step by step.
First, What Is a Glueless Wig Install?
A glueless wig is designed to be worn securely without relying on traditional wig adhesive along the hairline.
Depending on the wig construction, security can come from adjustable straps, an elastic band, combs or clips, the fit of the cap, and proper customization.
That's important because glueless doesn't mean unsecured.
A properly fitted wig should feel comfortable and secure enough for normal wear without you spending the entire day wondering whether it has moved.
Why I Think Glueless Wigs Are Beginner-Friendly
When you're learning how to install wigs, there can be a lot happening at once.
You're thinking about your natural hair underneath, where the wig should sit, how to make the lace disappear, how much lace to cut, how to create a realistic hairline and how to style everything afterward.
Adding adhesive can make the process feel even more intimidating.
A glueless install allows you to focus on something more important first:
Fit and placement.
Once those two things make sense, everything else becomes easier.
Step 1: Prep Your Natural Hair
A beautiful wig install starts underneath the wig.
Your natural hair should be clean, dry and arranged as flat as comfortably possible. Depending on your hair and the wig you're wearing, that might mean braids or another low-profile foundation.
The goal isn't to create painfully tight braids.
You simply don't want unnecessary bulk underneath the wig because that bulk can change the way the unit sits on your head.
And don't forget about your scalp.
Wearing a wig doesn't mean your natural hair-care routine disappears. Your scalp and hair underneath still need regular care.
Step 2: Make Sure Your Wig Actually Fits
This is one of the biggest differences between a glueless wig that feels effortless and one you're constantly adjusting.
Fit matters.
Before worrying about lace or baby hairs, put the wig on and assess the cap.
Is it too loose?
Does it slide backward?
Does it feel overly tight around your temples?
Does the lace naturally sit where you want your hairline to be?
Adjust the straps or elastic band if your wig has them.
A glueless install shouldn't depend on styling tricks to compensate for a wig that doesn't fit properly.
Step 3: Position the Wig Before Cutting Anything
Beginners sometimes get excited and start cutting the lace immediately.
Wait.
Put the wig on first.
Position the hairline.
Check the ear area.
Look at the center.
Look at both sides.
Make sure you understand where you want the wig to sit before you permanently alter the lace.
You can always cut more lace.
You can't put it back once it's gone.
Step 4: Take Your Time Cutting the Lace
This is probably the part that makes new wig wearers the most nervous.
You don't need to rush it.
Work in manageable sections rather than trying to make one perfect cut across the entire hairline.
Follow the shape of the customized hairline while being careful not to cut into the actual wig hair.
And remember: the goal isn't simply to remove lace.
The goal is for the remaining lace to disappear as naturally as possible once the wig is positioned.
If you want to see exactly how I approach this step, this is one of the parts that's much easier to understand visually in my YouTube tutorial.
→ WATCH THE FULL GLUELESS WIG INSTALL TUTORIAL ON YOUTUBE
Add your direct YouTube video link to this text.
Step 5: Check the Lace Before Adding More Product
This is where I want beginners to resist the urge to throw every product they own at the hairline.
If the wig has been properly fitted and customized, you may need much less than you think.
Look at your lace.
Check the color.
Check the placement.
Check whether any areas need additional adjustment.
A natural-looking wig isn't necessarily created by piling products over the lace.
Often, it's the little details underneath that make the difference.
Step 6: Focus on the Hairline
A wig can have beautiful hair and still look unnatural if the hairline doesn't make sense.
Density matters here.
Natural hairlines aren't usually one perfectly dense wall of hair.
Customization may include adjusting density, refining the part and shaping the front so the wig complements the person wearing it.
This is also why buying a good wig is only part of the equation.
Customization changes everything.
Step 7: Style the Wig Like Hair
Once your wig is secure, it's time for the fun part.
Style it.
Depending on your desired look, that could mean straightening, curling, creating soft waves or simply refining the shape it already has.
But treat human-hair wigs the same way you should treat other human-hair extensions.
Use heat protection.
Don't automatically turn your hot tools to their maximum temperature.
And don't keep restyling the entire wig every day if only a few areas need refreshing.
The less unnecessary manipulation, the better.
Do You Need Baby Hairs for a Glueless Wig?
No.
Baby hairs are a styling preference—not a requirement for making a wig look natural.
Some clients love them.
Others prefer a clean hairline with little or no baby hair.
Both can work.
What matters more is the quality of the lace, fit, customization and how the hairline works with your face.
Don't feel like your wig isn't finished simply because you didn't create elaborate edges.
Can You Take a Glueless Wig Off Every Night?
That's one of the reasons many people are interested in them.
Depending on your wig and how you've chosen to wear it, a glueless unit can offer the flexibility of removing your wig rather than committing to an adhesive installation.
That can also make it easier to access your natural hair and scalp.
But removing your wig doesn't mean tossing it onto the dresser.
Place it on an appropriate wig stand or store it in a way that protects the hair, lace and shape.
The better you care for your unit when you're not wearing it, the better it will look when you put it back on.
Why Doesn't My Glueless Wig Look Like the Tutorial?
Don't get discouraged if your first attempt doesn't look exactly like a professionally customized wig.
What you see in a finished tutorial is the combination of several skills:
wig construction + fit + lace customization + placement + haircut + styling.
The curling iron isn't doing all the work.
And sometimes the issue isn't your installation technique at all.
The wig itself may need professional customization.
If you're constantly fighting the hairline, cap size, density or lace, adding another styling product probably isn't going to solve the underlying problem.
The Biggest Beginner Mistake: Trying to Make It Perfect
Your first install doesn't need to take three hours.
And it doesn't need to look like someone who has installed hundreds of wigs.
Start by mastering the foundation:
Prep your hair. Get the fit right. Position the unit. Learn your lace. Then style.
Once you understand those steps, you'll become much faster and more confident.
Want to See Me Do the Full Install?
Some hair techniques are simply easier to understand when you can watch someone's hands.
That's why I created the video tutorial.
In the video, you can follow along with me and see how I approach the glueless installation instead of trying to interpret every step from written instructions.
→ WATCH: BEGINNER-FRIENDLY GLUELESS WIG INSTALL TUTORIAL
Save this blog as your checklist, open the video beside you, and work through the installation at your own pace.
Final Thought
A glueless wig doesn't need to be complicated to look good.
And being beginner-friendly doesn't mean sacrificing a natural result.
The foundation is what makes the difference.
When your natural hair is properly prepared, your wig fits correctly, the lace is customized and the unit is positioned intentionally, you shouldn't need to depend on layers of glue just to feel secure in your wig.
Learn the foundation first.
Then everything else becomes styling.
If you’re ready to stop guessing and start working with structure, education paired with the right service plan makes all the difference.
